

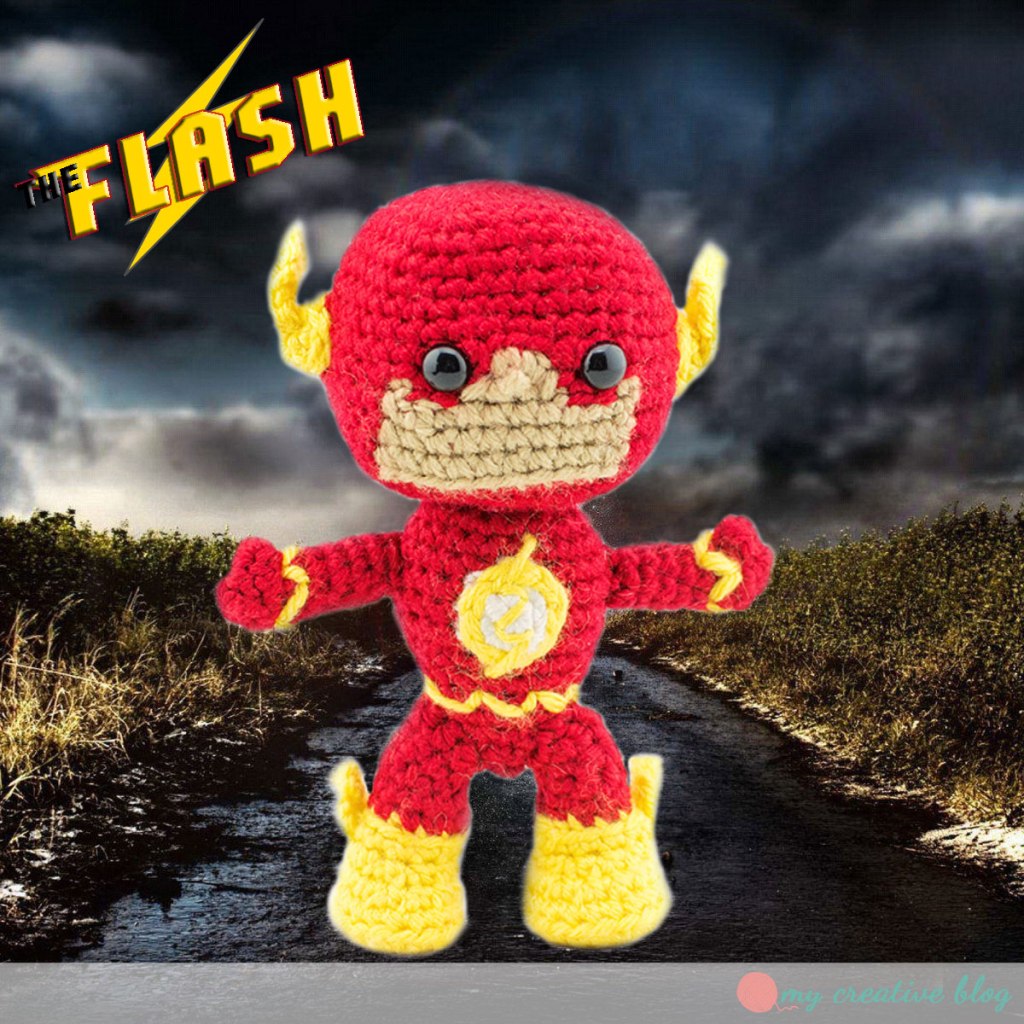
My son’s favorite superhero is The Flash. He’s only 5 and The Flash has been his favorite superhero for a couple years now, which I think is pretty amazing since The Flash isn’t a mainstream superhero. He’s gaining some popularity lately, but he still takes a back burner to other superheroes like Batman, Superman, Spiderman, etc. And at 5, kids tend to follow what everyone else is doing or likes, so I found his interest in The Flash pretty awesome! Of course, that meant I had to create him a crocheted version of The Flash, especially since The Flash is really hard to find in retail stores. So, I introduce to you, my version of The Flash crochet pattern. Enjoy!

Materials:
– Worsted weight yarn in red.
– Worsted weight yarn in yellow.
– Worsted weight yarn in skin color.
– Worsted weight yarn in White.
– 9mm Safety Eyes
– Size E (3.5mm) Crochet Hook
– Yarn Needle
– Fiberfil
Size: 5½” tall
Guage:
5 sts x 6 rows = 1″ x 1″
Not critical for this project.
Difficulty:
❤❤♡♡ Advanced Beginner
| Abbreviations: | |
| ch = Chain sp(s) = space(s) st(s) = stitch(es) sl st = Slip Stitch sk = Skip FO = Finish Off | sc = Single Crochet hdc = Half Double Crochet inc = Single Crochet Increase (2 sc in same st) dec = Single Crochet Decrease blo = Back Loop Only flo = Front Loop Only |
| Special Stitches: | |
| MC – Magic Circle | |
Instructions:
- This pattern is written in American Standard Terms.
- Place a marker in the first stitch of every round to indicate the beginning and move the marker up at the start of each new round.
- All stitches are worked through both loops unless otherwise indicated.
- Instructions between ** are to be repeated until the end of the round.
- Instructions between [] are made in the same st.
- Numbers between () indicate the total amount of stitches in that round.
- When making color changes, remember to always change to the new color before the last yarn over of the last stitch in the old color.

Head:
Worked in the round without joining.
Round 1: With red, 4 sc in MC. (4)
Round 2: 3 sc in each st. (12)
Round 3: sc, *3 sc, sc 2* repeat 3 times,
3 sc, sc. (20)
Round 4: sc 2, *3 sc, sc 4* repeat 3 times,
3 sc, sc 2. (28)
Round 5: sc 3, *3 sc, sc 6* repeat 3 times,
3 sc, sc 3. (36)
Round 6: sc 4, *2 sc, sc 8* repeat 3 times,
2 sc, sc 4. (40)
Round 7-10: sc around. (40)
Round 11: With red, sc 19. Change to skin color, 2 sc in next 2 sts. Change to red, sc 19. (42)
Round 12: With red, sc 15. Change to skin color, sc. Change to red, sc 2. Change to skin color, sc 2, sk next 2 sts, sc 2. (This creates the nose.) Change to red, sc 2. Change to skin color, sc. Change to red, sc 15. (40)
Round 13-15: With red, sc 15. Change to skin color, sc 10. Change to red, sc 15. (40)
Round 16: With red, sc around. (40)
Place 9mm eyes between rounds 11-12 spacing 4 sts apart. Each eye should be in the center of each red area on either side of the nose.
Round 17: sc 3, *dec twice, sc 6* repeat 3 times, dec twice, sc 3. (32)
Round 18: sc 2, *dec twice, sc 4* repeat 3 times, dec twice. sc 2. (24)
Begin Stuffing head.
Round 19: sc, *dec twice, sc 2* repeat 3 times, dec twice, sc. (16)
Round 20: *dec* around. (8)
Finish stuffing. Sew opening closed and leave long tail for sewing head to body.
Body:
Worked in the round without joining.
Round 1: With red, 6 sc in MC. (6)
Round 2: Inc in each st around. (12)
Round 3: *sc, inc* repeat around. (18)
Round 4: *sc 2, inc* repeat around. (24)
Round 5-9: sc around. (24)
Round 10: *6 sc, sc dec 3 times* repeat twice. (18)
Round 11: sc around. (18)
Round 12: *5 sc, sc dec twice* repeat twice. (14)
Round 13: sc around. (14)
Begin stuffing.
Round 14: *3 sc, sc dec twice* repeat twice. (10)
Round 15: *sc dec* around. (5)
Finish stuffing and sew seam closed. Leave long tail for sewing head to body. Pull yarn through middle of body. Sew head to body.
Body Stitching: With yellow and threaded through the needle, insert the needle 3 rounds up from the bottom of the body and *make a diagonal line [3 sts to the left and up one st], make a straight line down one st below.* Repeat pattern between ** around the body.
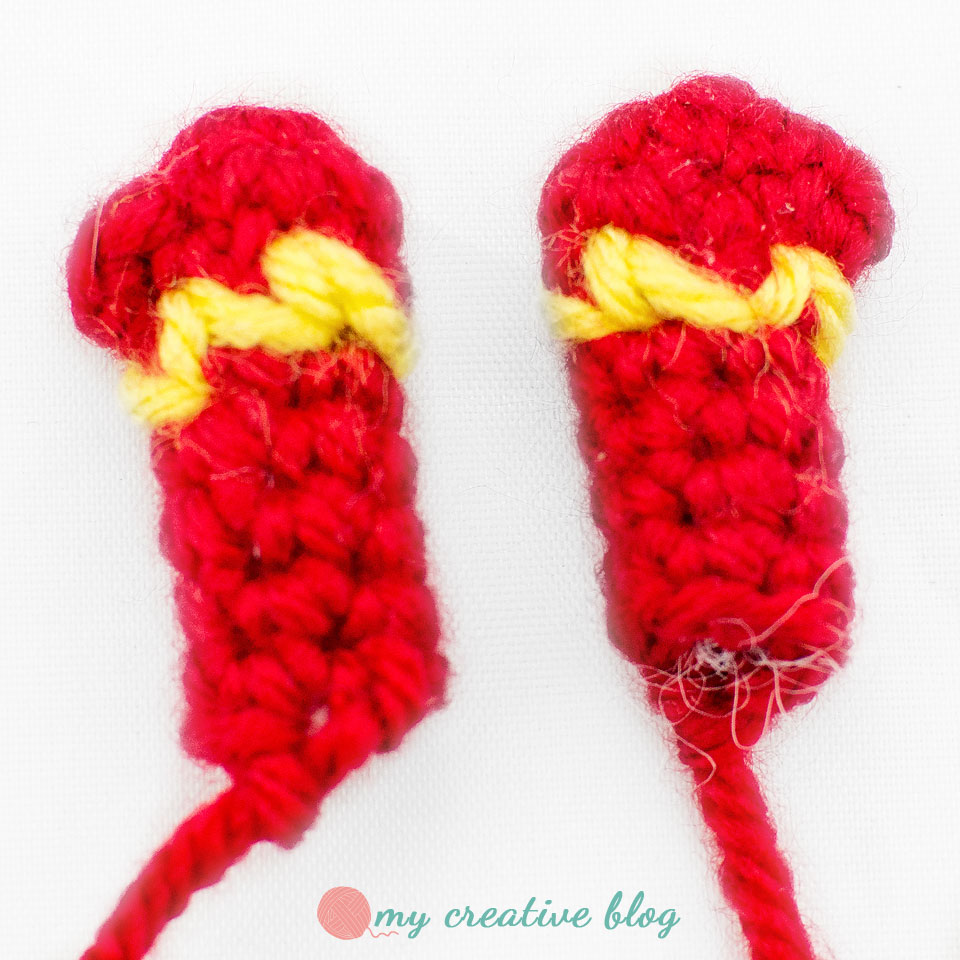
Arms (2):
Worked in the round without joining.
Round 1: With red, 6 sc in MC. (6)
Round 2: sc, inc, work thumb [ch 1, sc in previous sc made, sl st in the same sp as inc], *sc,inc* twice. (8)
Round 3: *sc, dec* repeat around. Keep thumb in front of stitches. (6)
Round 4-8: sc around. (6)
Lightly Stuff. Leave long tail for sewing onto Body.
Arm Stitching: Insert the needle between rounds 3-4 of arm and *make a diagonal line [2 sts to the left and up one st], make a straight line down one st below.* Repeat pattern between ** around the arm above the fist.
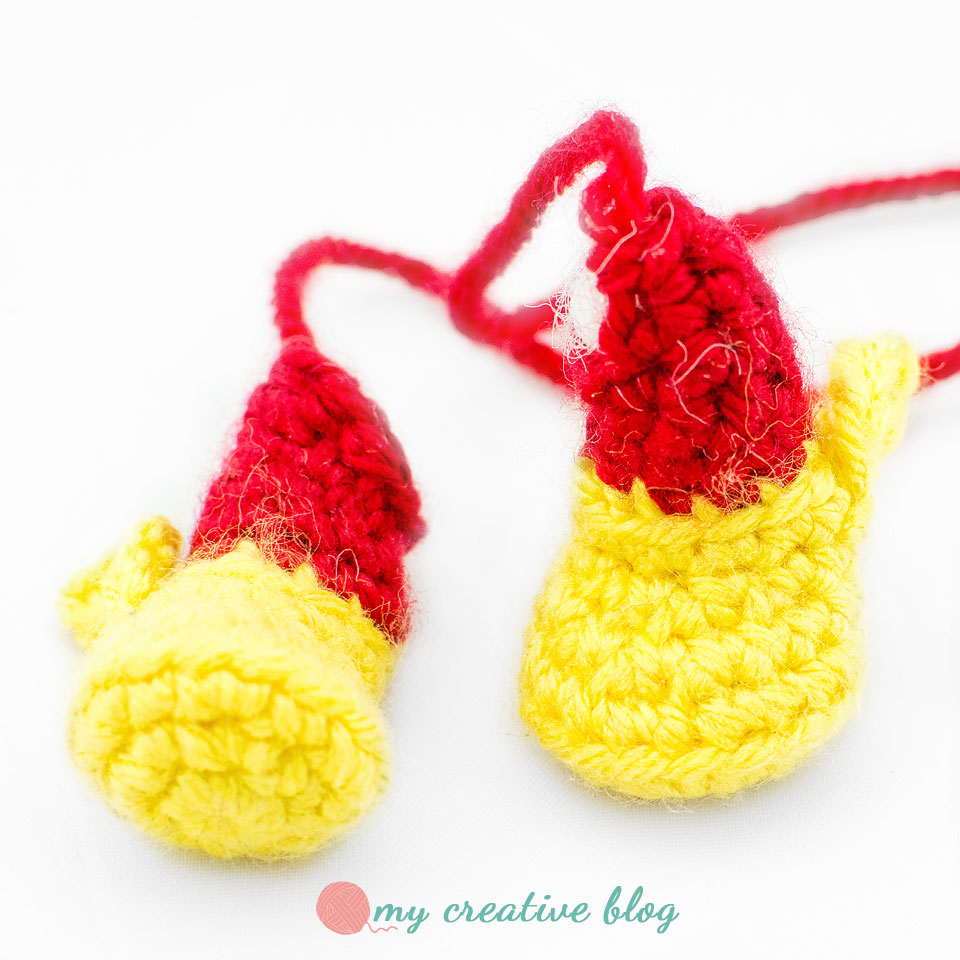
Legs (2):
Worked in the round without joining.
Work one left and one right.
Round 1: With yellow, 6 sc in MC. (6)
Round 2: Inc in each st around. (12)
Round 3: *sc, inc* repeat around. (18)
Round 4: In BLO, sc around. (18)
Left Foot
Round 5: sc 10, dec 3 times, sc 2 (15)
Round 6: sc 8, dec 3 times, sc (12)
Right Foot
Round 5: sc 2, dec 3 times, sc 10 (15)
Round 6: sc, dec 3 times, sc 8 (12)
Round 7: sc around. (12)
Round 8: Change to red. In BLO, *sc 2, dec* repeat around. (9)
Round 9: sc around. (9)
Begin Stuffing.
Round 10-12: sl st 3, sc, hdc 4, sc. (9)
Finish stuffing. Leave long tail for sewing onto Body.
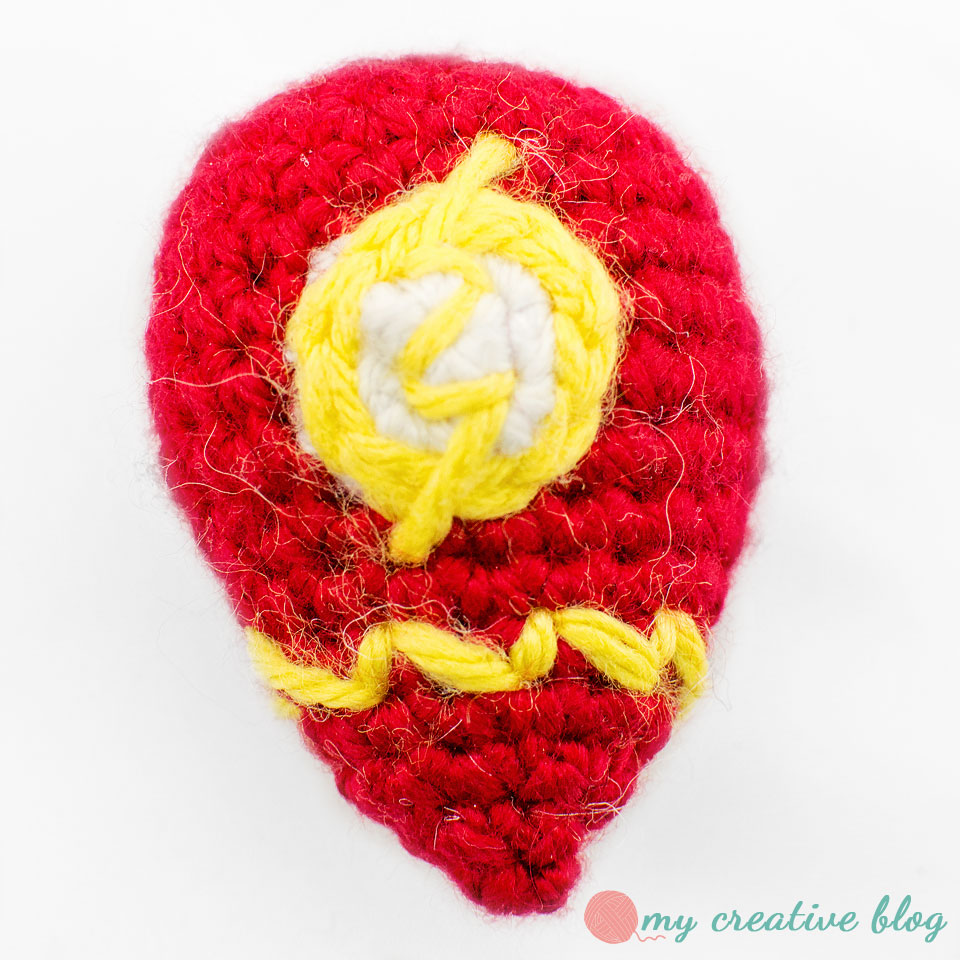
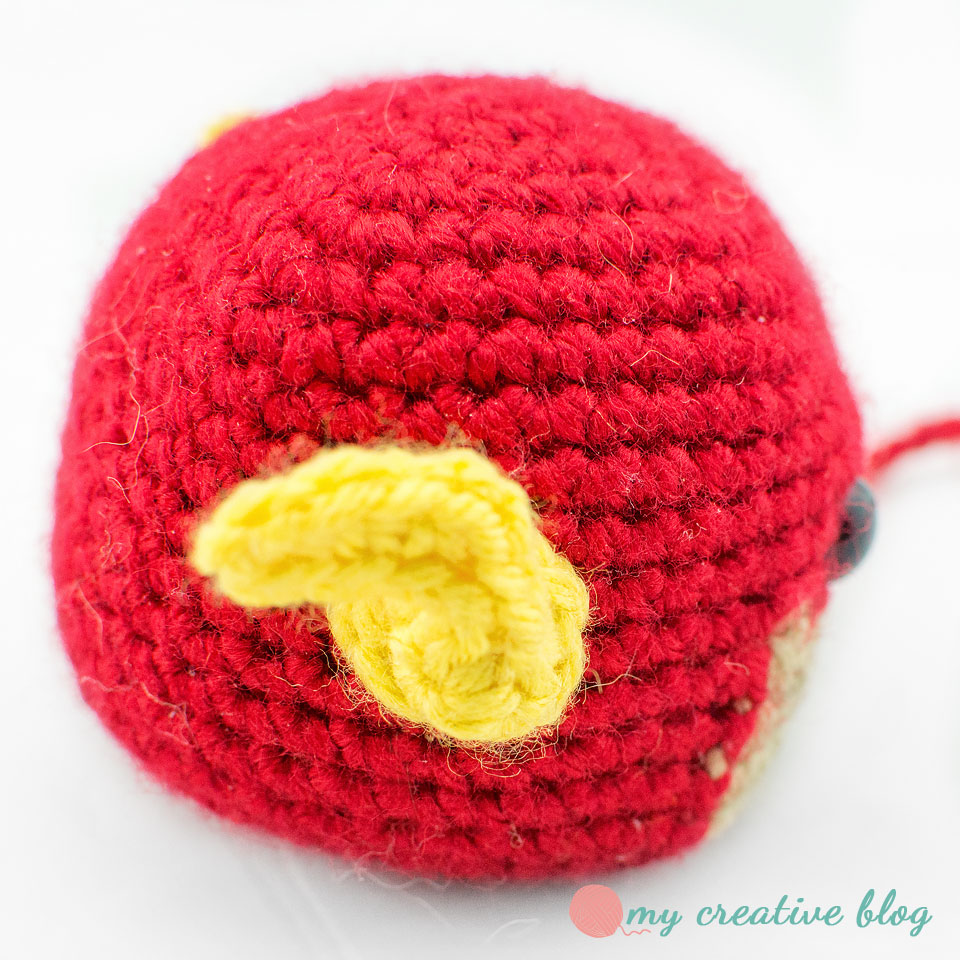
Emblem:
Worked in the round without joining.
Round 1: With white, sc 4 in MC. (4)
Round 2: Inc in each st around. (8)
FO. Leave long tail for sewing.
With yellow, join to the emblem and sl st in each st around. FO.
FO. Weave in ends.
Sew emblem to body between rounds 6-9. With yellow, stitch a thunderbolt on top of emblem and body.
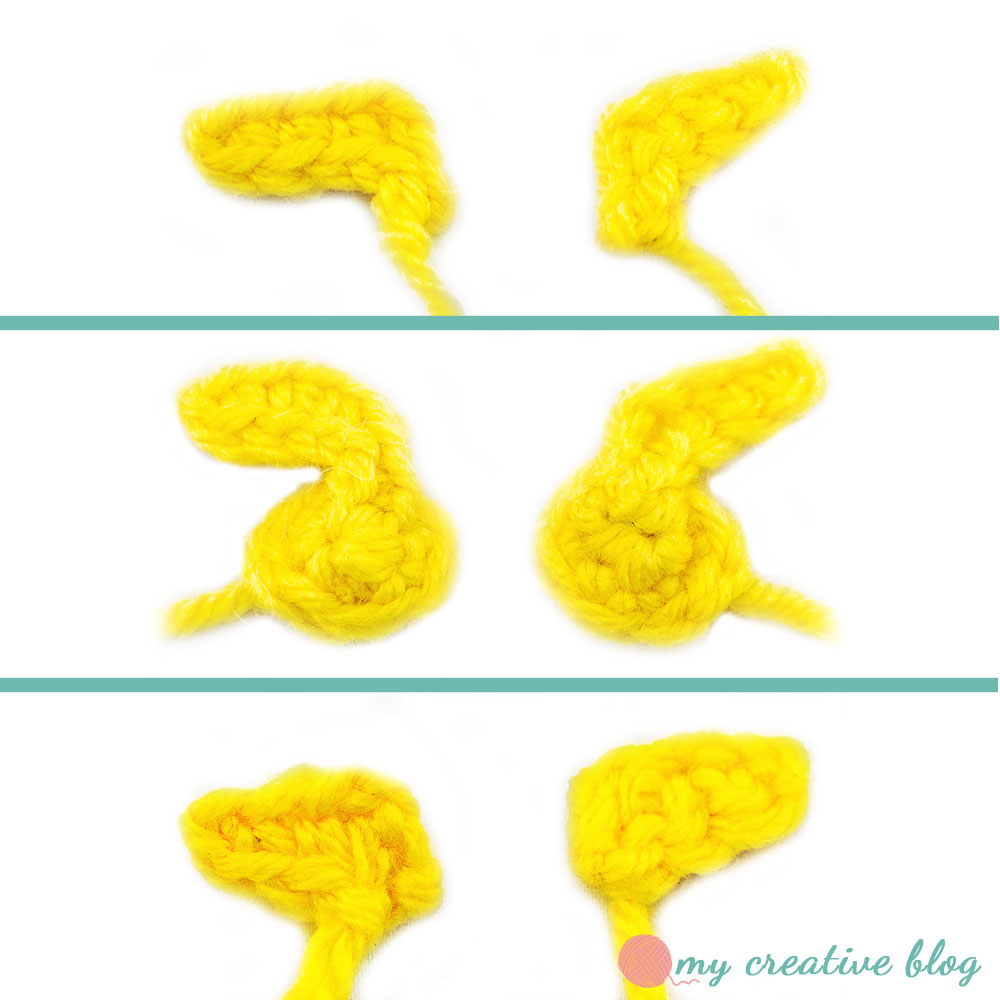
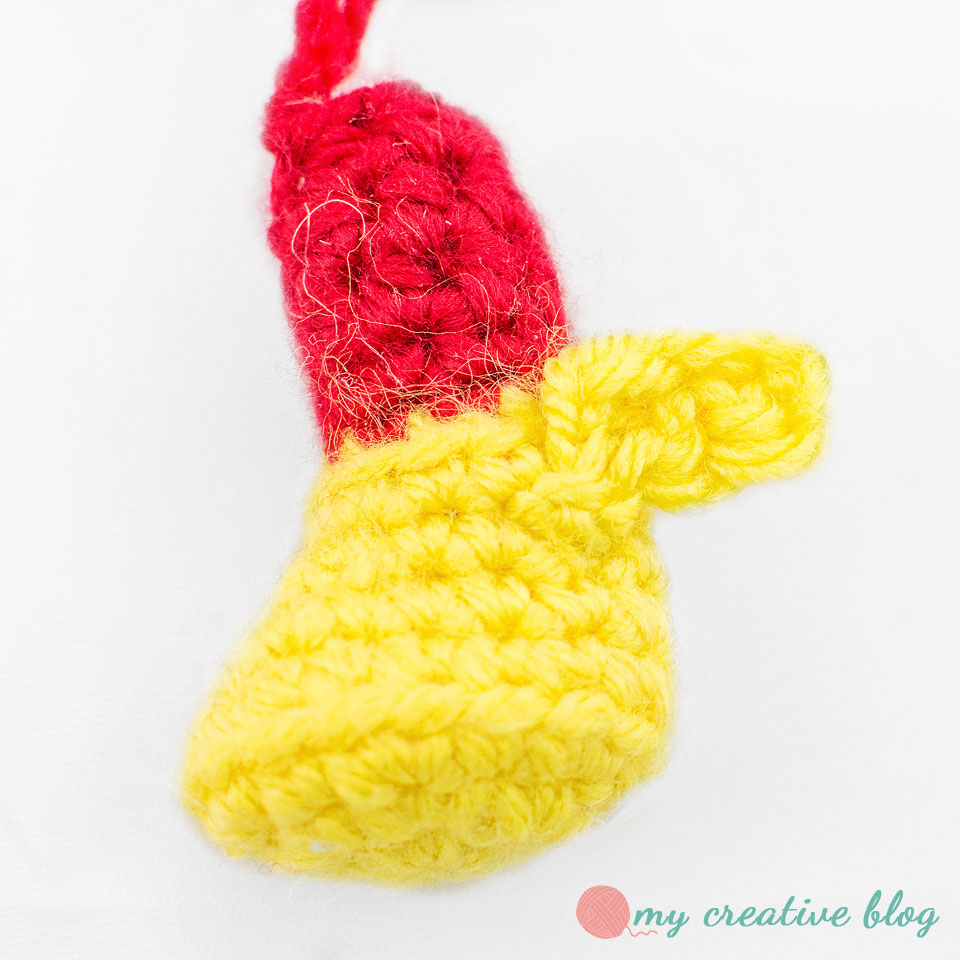
Helmet Wings:
Worked in the round without joining.
Round 1: With yellow, sc 4 in MC. (4)
Round 2 *sc, inc* repeat around. (6)
FO. Leave long tail for sewing.
With yellow, ch 8. sc in 2nd ch from hook and next 2 chs, sk 2 chs, sl st in last 2 chs.
FO. Leave long tail for sewing to circle previously made. Sew Helmet wings to the sides of the head between rounds 10-13, 4 sts from the face.
Boot Wings:
With yellow, ch 6. sc in 2nd ch from hook and next ch, sk 2 chs, sl in last ch.
FO. Leave long tail for sewing to boots.
Don’t forget to share your projects on Ravelry or in the comments!
Or share on Instagram and tag #mycreativeblog.
This item is not a licensed product. I do not claim ownership of any character or image used in my designs. Copyrights and/or trademarks of any character and/or image used belong to their respective owners and are not being sold.

Leave a comment