
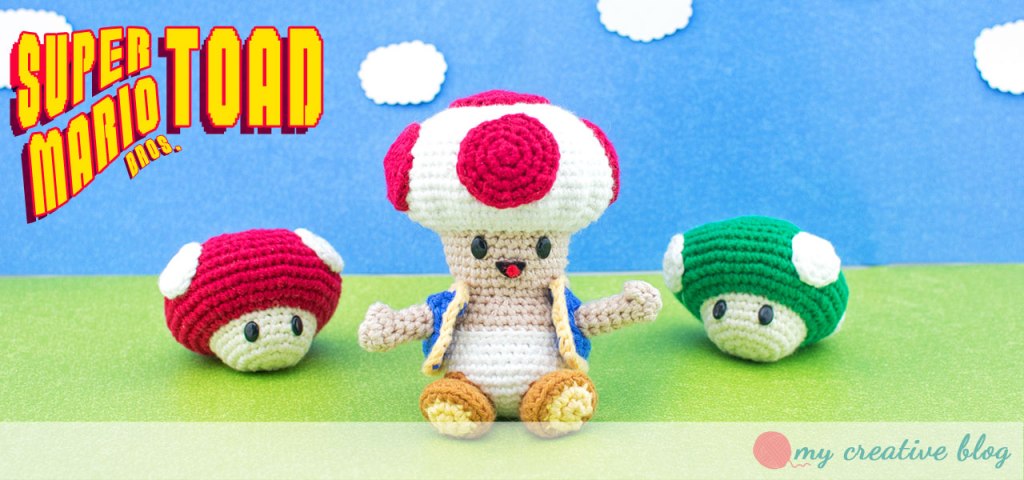
My most favorite games are ones by Nintendo made during 80-90s. They are simple and fun games with simple concepts. I love all the Mario games and some of my favorite characters are the non-human ones. Well, I made myself a Yoshi and a Birdo, but one that I was missing and love was Toad. Without many patterns available for Toad and none that met a similar style to my Yoshi and Birdo, I decided to design my own Toad pattern. I thought it’d be great to share that pattern here:

Materials:
– Worsted weight yarn in white.
– Worsted weight yarn in red.
– Worsted weight yarn in skin color.
– Worsted weight yarn in Brown.
– Worsted weight yarn in Yellow.
– Worsted weight yarn in Blue.
– 6 x 8 mm oval Safety Eyes
– Size D (3.25mm) Crochet Hook
– Yarn Needle
– Fiberfil
Size: 4″ tall
Guage:
6 sts x 7 rows = 1″ x 1″
Not critical for this project.
Difficulty:
❤❤♡♡ Advanced Beginner
| Abbreviations: | |
| ch = Chain sp(s) = space(s) st(s) = stitch(es) sl st = Slip Stitch sk = Skip FO = Finish Off | sc = Single Crochet dc = Double Crochet dec = Single Crochet Decrease blo = Back Loop Only flo = Front Loop Only |
| Special Stitches: | |
| MC – Magic Circle | |
Instructions:
- This pattern is written in American Standard Terms.
- Place a marker in the first stitch of every round to indicate the beginning and move the marker up at the start of each new round.
- All stitches are worked through both loops unless otherwise indicated.
- Instructions between ** are to be repeated until the end of the round.
- Instructions between [] are made in the same st.
- Numbers between () indicate the total amount of stitches in that round.
- When making color changes, remember to always change to the new color before the last yarn over of the last stitch in the old color.
Body:
Worked in the round without joining.
With white and D (3.25mm) hook,
Round 1: 6 sc in MC. (6)
Round 2: 2 sc in each st around. (12)
Round 3: *sc, 2 sc* repeat around. (18)
Round 4: *sc 2, 2 sc* repeat around. (24)
Round 5: *sc 3, 2 sc* repeat around. (30)
Round 6: *sc 4, 2 sc* repeat around. (36)
Round 7-9: sc around. (36)
Round 10: *sc 4, dec* repeat around. (30)
Round 11: sc around. (30)
Round 12: Change to skin color and BLO, sc around. (30)
Round 13: In both loops, sc around. (30)
Round 14: *sc 3, dec* repeat around. (24)
Round 15: *sc 2, dec* repeat around. (18)
Round 16: *sc 2, 2 sc* repeat around. (24)
Round 17: * sc 3, 2 sc* repeat around. (30)
Round 18-21: sc around. (30)
Round 22: *sc 3, dec* repeat around. (24)
Place eyes between round 20 & 21, 4 sts apart.
Round 23: Change to white and FLO, 2 sc around. (48)
Round 24: In both loops, *sc 3, 2 sc* repeat around. (60)
Round 25: *sc 3, 2 sc* repeat around. (75)
Round 26-28: sc around. (75)
Round 29: *sc 3, dec* repeat around. (60)
Round 30-31: sc around. (60)
Round 32: *sc 4, dec* repeat around. (50)
Round 33: sc around. (50)
Round 34: *sc 3, dec* repeat around. (40)
Round 35: sc around. (40)
Round 36: *sc 2, dec* repeat around. (30)
Round 37: sc around. (30)
Round 38: *sc, dec* repeat around. (20)
Round 39: sc in each st around. (20)
Round 40: dec repeat around. (10)
Thread through remaining stitches and pull tight. FO.
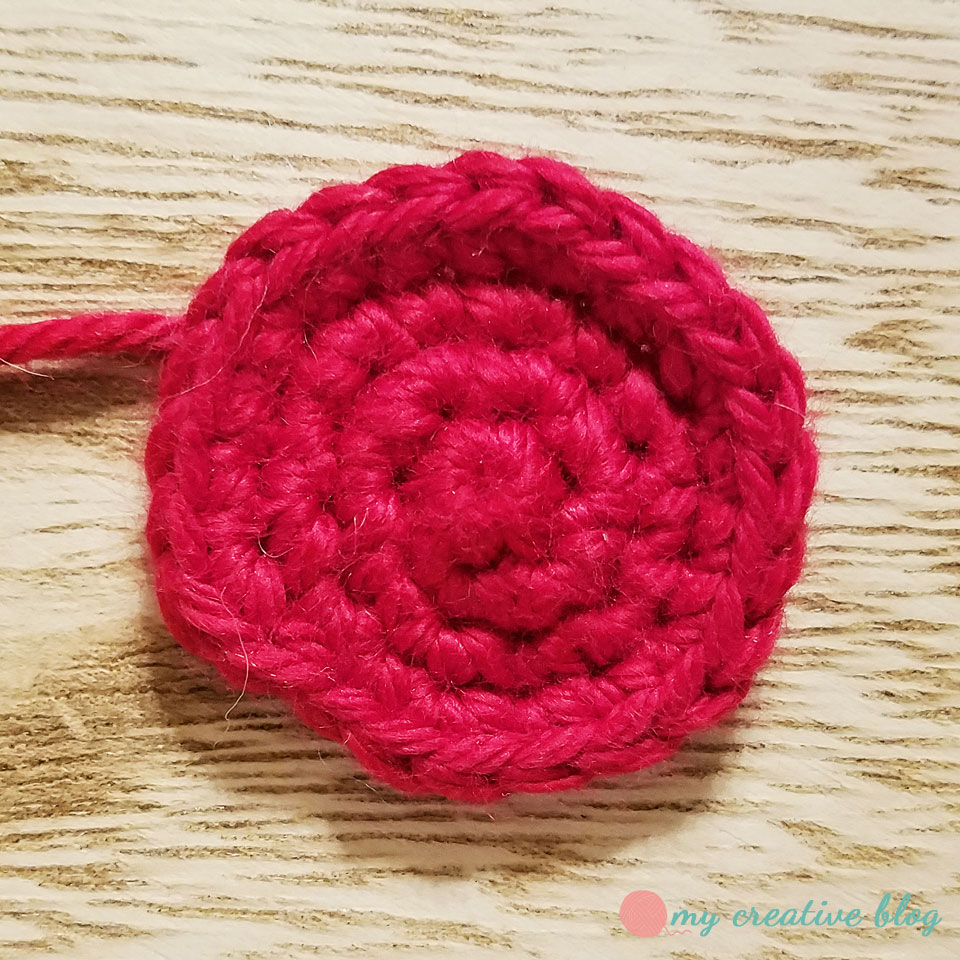
Spots (5):
Worked in the round without joining.
With red and D (3.25mm) hook,
Round 1: 6 sc in MC. (6)
Round 2: 2 sc in each st around. (12)
Round 3: *sc, 2 sc* repeat around. (18)
Round 4: *sc 2, 2 sc* repeat around. (24)
FO. Leave long tail for sewing onto Body top.
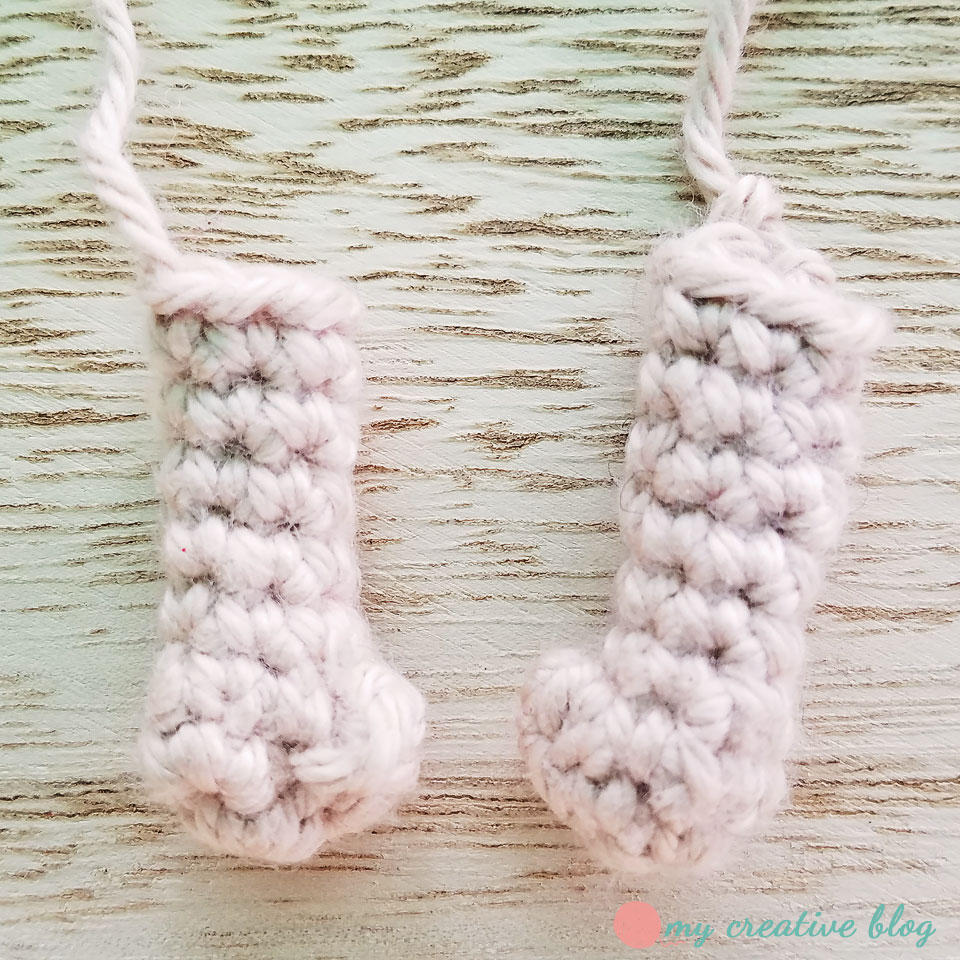
Arms (2):
Worked in the round without joining.
With skin color and D (3.25mm) hook,
Round 1: 6 sc in MC. (6)
Round 2: sc, 2 sc, work thumb [ch 1, sc in previous sc made, sl st in the same sp as 2 sc], *sc, 2 sc* repeat twice. (8)
Round 3: *sc, dec* around. Keep thumb in front of stitches. (6)
Round 4-8: sc around. (6)
FO. Leave long tail for sewing onto Body.
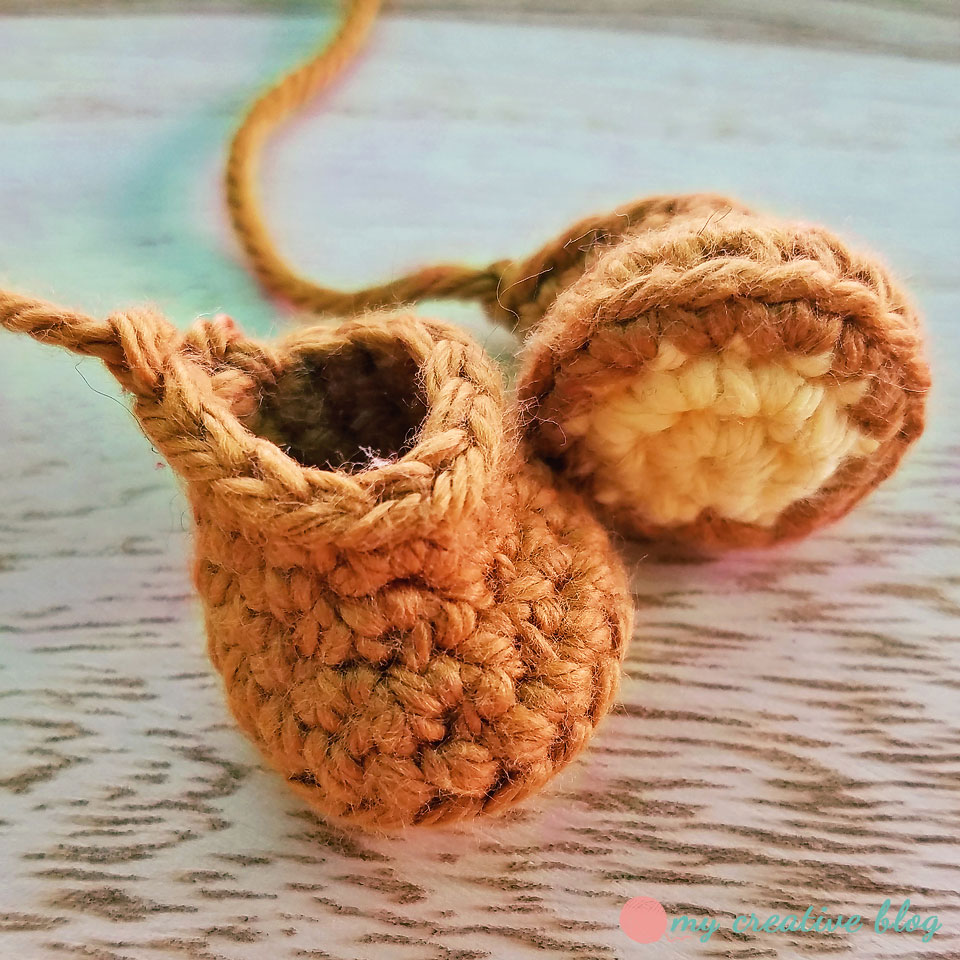
Feet (2):
Worked in the round without joining.
With yellow and D (3.25mm) hook,
Round 1: 6 sc in MC. (6)
Round 2: 2 sc in each st around. (12)
Round 3: Change to brown, *sc, 2 sc* around. (18)
Round 4: In BLO, sc around. (18)
Round 5: sc 6, dec three times, sc 6 (15)
Round 6: sc 5, dec three times, sc 4 (12)
Round 7: sc around. (12)
FO. Leave long tail for sewing onto Body.
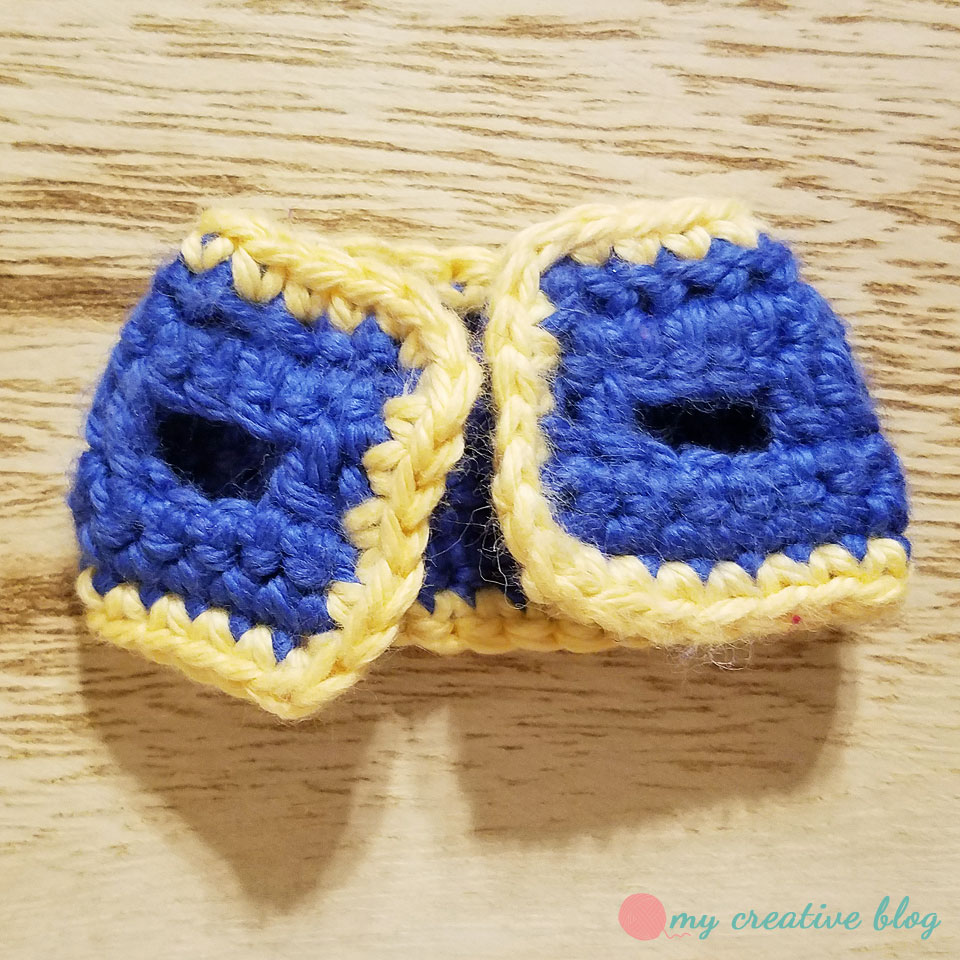
Vest:
Worked in rows.
With blue and D(3.25mm) hook,
Row 1: ch 19, sc in 2nd ch and each ch across (18)
Row 2: *sc, 2 sc* across. ch 2, turn. (30)
Row 3: dc 2, ch 3, sk 3 sts, dc 20, ch 3, sk 3 sts, dc 2. ch 1, turn. (24 dc)
Row 4: sc in each st and ch across. (30)
Row 5: sc across. FO. (30)
Finishing Round: With yellow, sc around entire vest. FO.
The pattern for the Mario Brothers Mushrooms can be found here.

Don’t forget to share your projects on Ravelry or in the comments!
Or share on Instagram and tag #mycreativeblog.

Leave a comment