

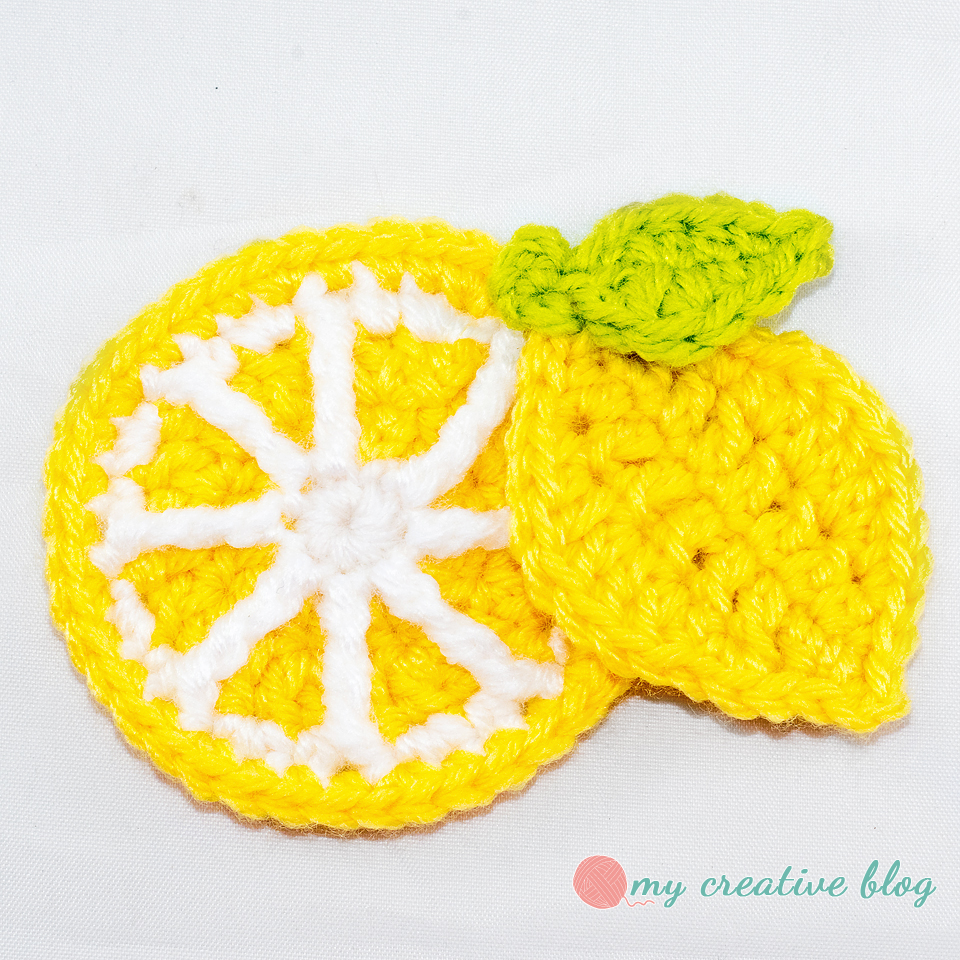
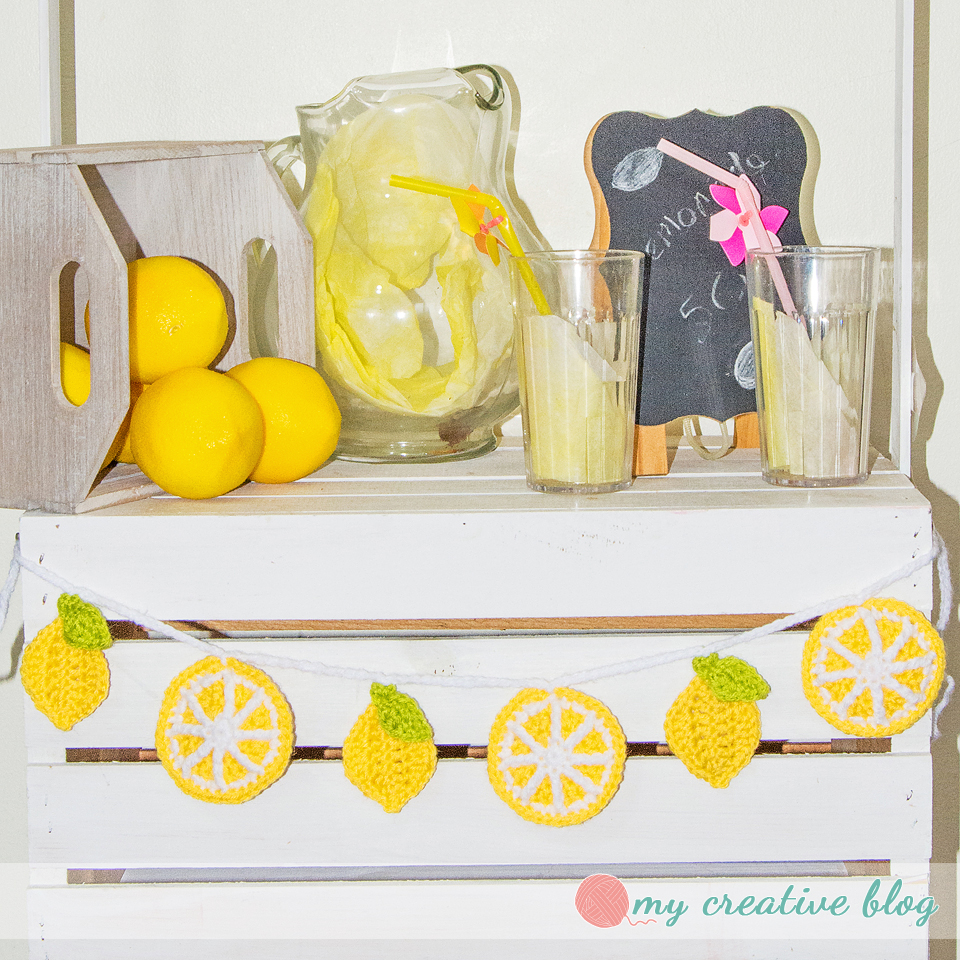
When life gives you lemons.. make Lemon Bunting. I wanted to make a fun Lemon Bunting Garland for my decorative Lemonade stand, so I whipped one up using two different shapes for the lemons. This garland is great for not only a Lemonade Stand but also, summer decor and summer parties or even use the lemon appliques as decoration on other items.
Materials:
– small amount of worsted weight yarn in lemon color. (I used Hobby Lobby’s I love this Yarn! in Yellow)
– small amount of worsted weight yarn in leaf color. (Hobby Lobby’s I love this Yarn! in Keylime)
– small amount of worsted weight yarn in white. (Hobby Lobby’s I love this Yarn! in White)
– Size G (4.0mm) Crochet Hook
– Yarn Needle
Size: Round Lemon – 3″ Diameter
Oval Lemon – 3″ height x 2″ width
Guage:
Not critical for this project.
Difficulty:
❤❤♡♡ Advanced Beginner
| Abbreviations: | |
| ch = Chain sp(s) = space(s) st(s) = stitch(es) sl st = Slip Stitch sk = Skip sc = Single Crochet | hdc = Half Double Crochet dc = Double Crochet blo = Back Loop Only RS = Right Side WS = Wrong Side FO = Finish Off |
| Special Stitches: | |
| MC – Magic Circle Double Treble Crochet (dtr) – An elongated post stitch. Using the same principal as the double crochet, the Double Treble uses three yarn overs before entering the fabric instead of one. 
To Change Color in sc: Yarn over and draw up a loop in the last st of the row, drop the color in use; with next color to be used, draw through 2 loops on hook. Continue with new color. For more helpful tips for changing colors seamlessly, check out Crochet Jogless Stripes. | |
Instructions:
- This pattern is written in American Standard Terms.
- Place a marker in the first stitch of every round to indicate the beginning and move the marker up at the start of each new round.
- All stitches are worked through both loops unless otherwise indicated.
- Instructions between ** are to be repeated until the end of the round.
- Instructions between [] are made in the same st.
- Numbers between () indicate the total amount of stitches in that round.
- When making color changes, remember to always change to the new color before the last yarn over of the last stitch in the old color.

Round Lemon:
Worked in the round with joins. Ch-2 and ch-1 does not count as a st.
With white and G (4.0mm) hook
Round 1: 8 sc in MC. (8)
Round 2: Change to yellow. In blo, ch 2 (does not count as st), 2 dc in same st and each st around. Join to top of 1st dc. (16)
Round 3: In both sts, ch 2, *2 dc, dc* repeat around. Join to top of 1st dc.(24)
Round 4: Change to white, ch 1, *2 sc, sc, [dtr in front loop on round 1], sk st on round 3* repeat 8 times. Join to top of 1st sc. (32)
Round 5: Change to yellow, ch 1, *2 sc, sc 3* repeat around. FO. (40)

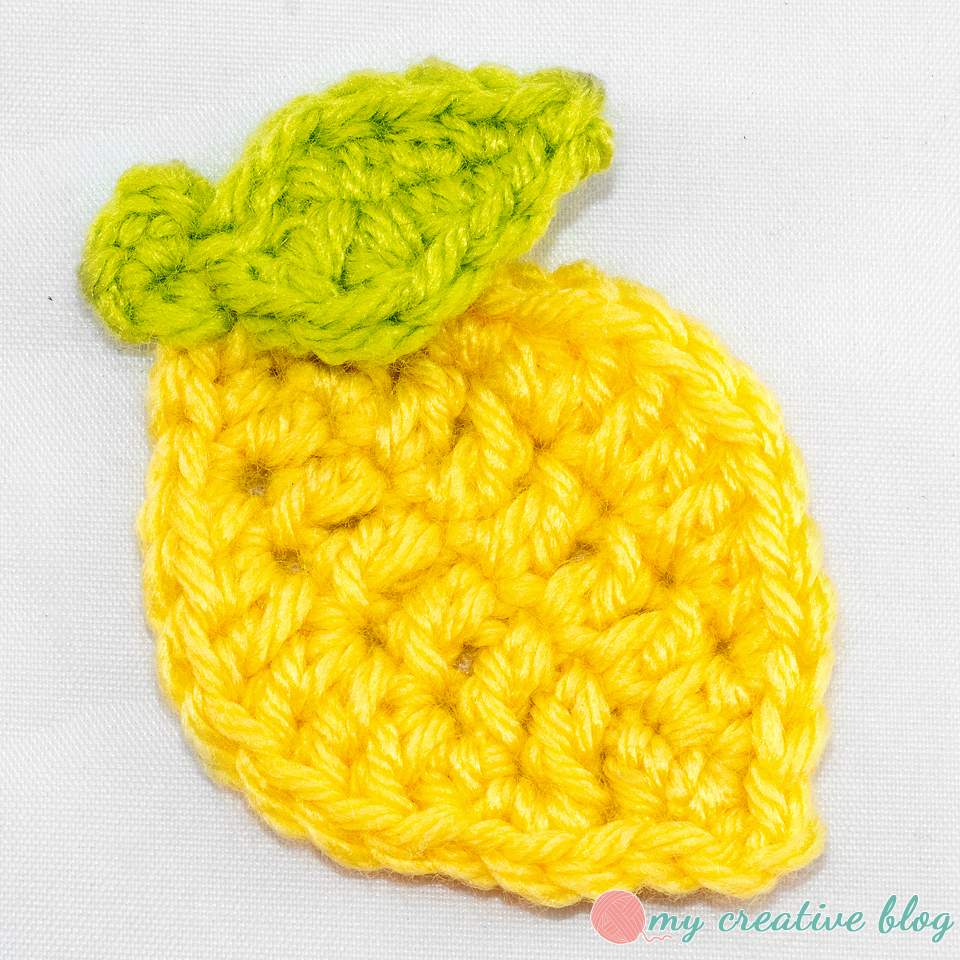
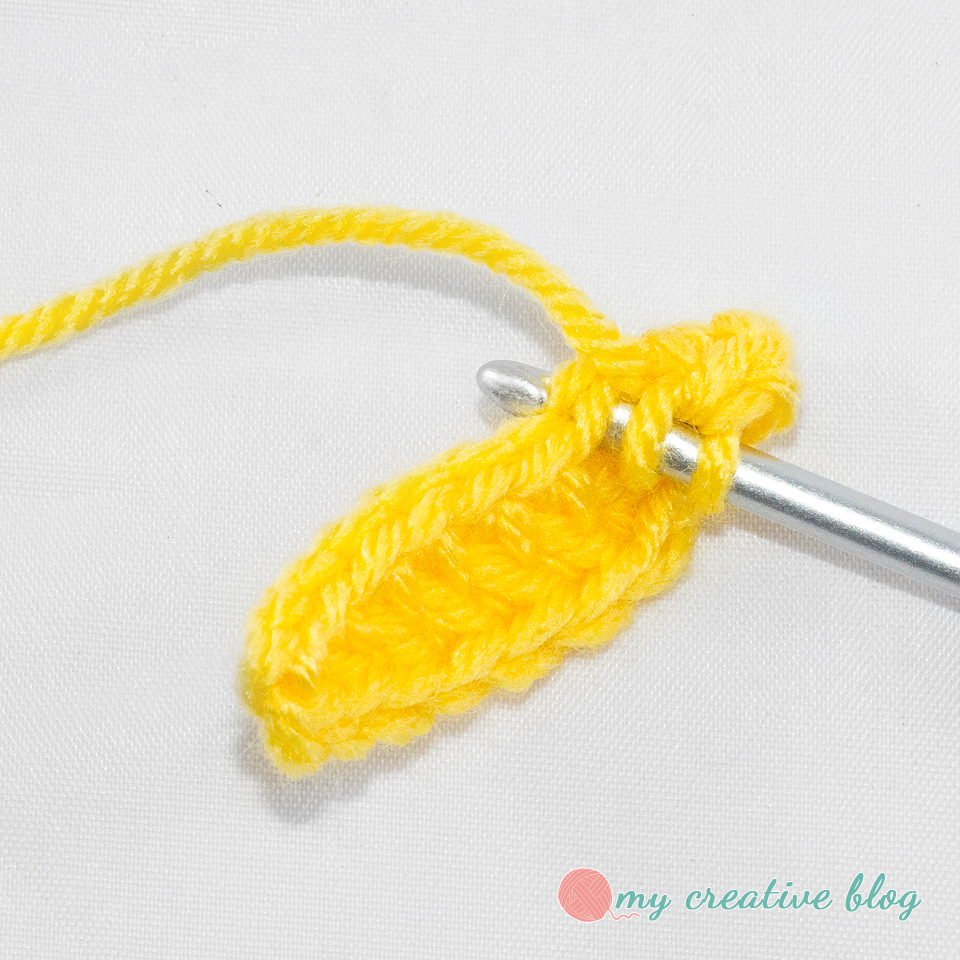
Oval Lemon:
Worked in the round, do not join.
With yellow, ch 10.
Round 1: In 2nd ch from hook sc, hdc in next ch, dc in next 5 chs, hdc in next ch, sc in last ch. Turn, and work across the unworked side of chs, sc in 1st ch, hdc in next ch, dc in next 5 chs, hdc in next ch, sc in last ch. (18)
Round 2: Ch 2, *sl st in next 2 sts, 2 sc in next st, [hdc dc] in next st, 2 dc in next st, [dc, hdc] in next st, 2 sc in next st, sl st in next 2 sts* repeat once more. (28)
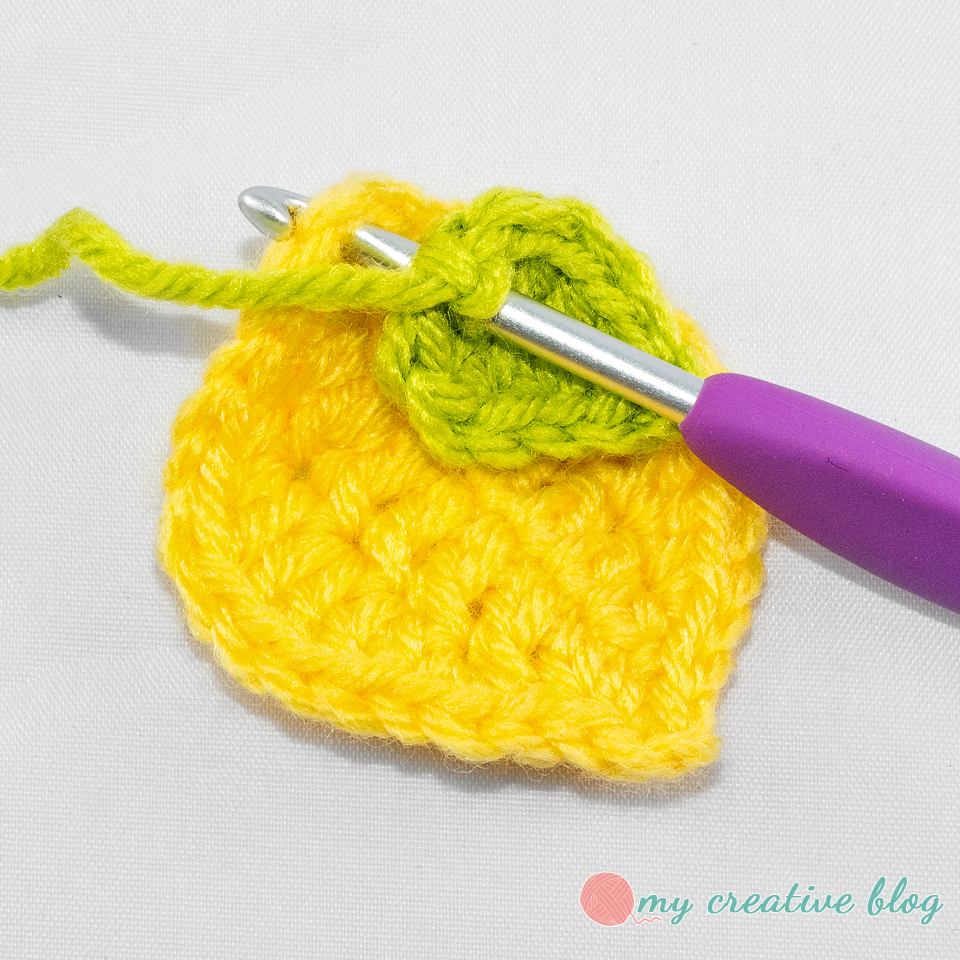
Leaf:
Round 1: With green, ch 6. In 3rd ch from hook, 2 dc in same ch, hdc in next ch, sc in next ch, sl st in next ch, ch 1. Turn, and work across unworked side of chs, sl st in 1st ch, sc in next ch, hdc in next ch, 2 dc in last ch. Join in top of ch 2 at beginning of round. (10)
Row 2: ch 1, sc in same st as join and ch 2 space at top of oval lemon (beg/end side of lemon), sc through all sts. In top ch 2 sp of top of lemon only (not in join st of leaf), sc again. (2)
Row 3: Ch 1, turn, sc in each sc. FO. (2)
Garland:
Ch 25, sl st to top of a lemon applique, ch 15, sl to top of lemon applique repeat until all appliques are attached, ch 25. FO.
Don’t forget to share your projects on Ravelry or in the comments!
Or share on Instagram and tag #mycreativeblog.

Leave a comment