
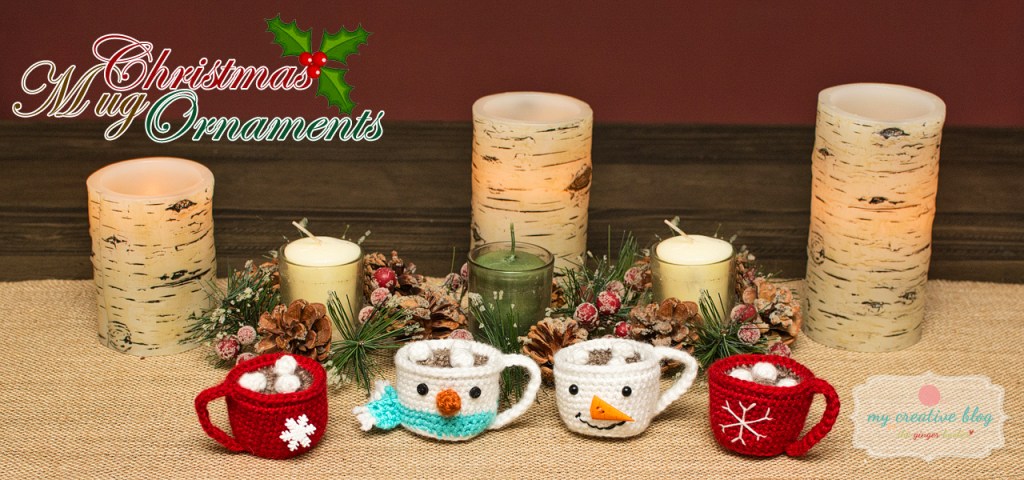
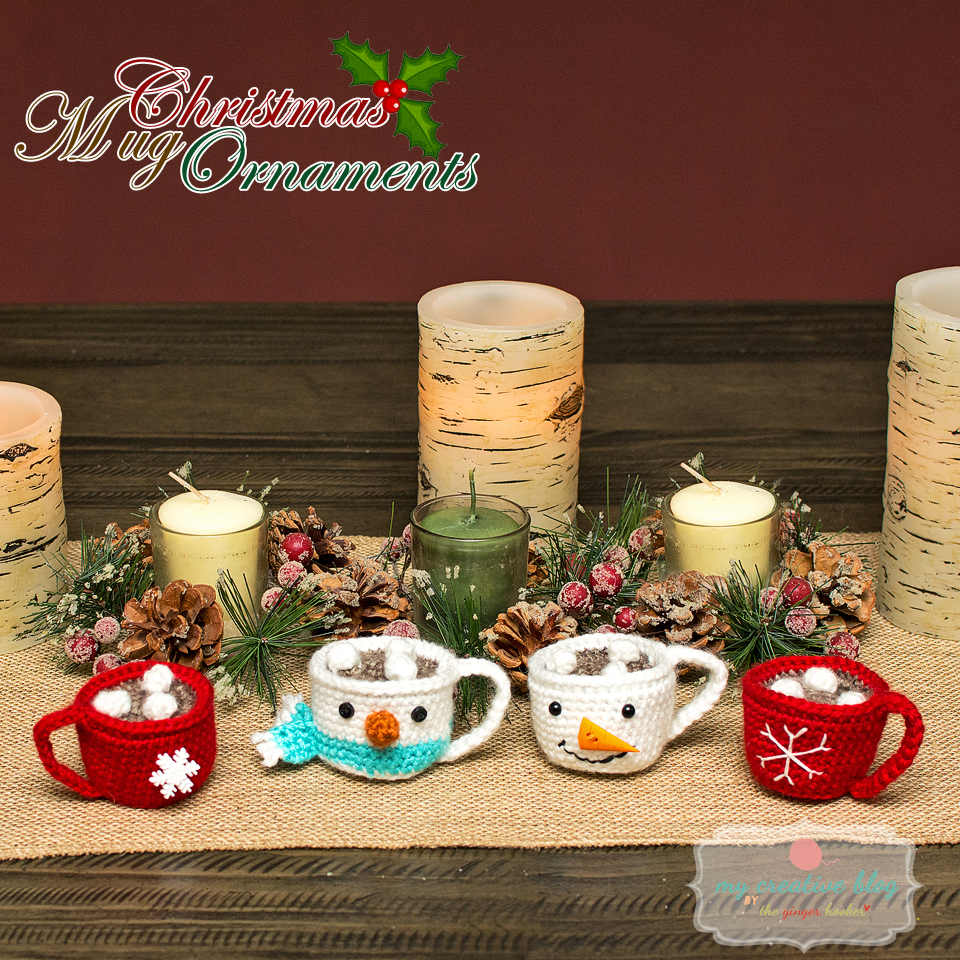
I came up with these designs for Christmas Mug ornaments this season for my own tree. It’s a simple design but it is easy to change up and give it many different looks. For instance, I made a snowman mug and I varied the different types of snowmen by using different embellishments. The snowman mug can be created with or without a scarf and can have many looks just by replacing different elements with buttons or thread. See what you can come up with just by changing colors and adding buttons or other elements! I personally plan to make a variety of mug ornaments to give out as embellishments on gifts this Christmas season.
Materials:
- Size G (4.0mm) Crochet Hook,
- Red (Main Christmas Mug Color) Worsted Weight Yarn
- Brown (Hot Chocolate) Worsted Weight Yarn
- White (Main Snowman Mug Color and Marshmallows) Worsted Weight Yarn
- Blue (Snowman Scarf) Worsted Weight Yarn (optional)
- Orange (Snowman nose) Worsted Weight Yarn (optional)
- Black, White embroidery thread (optional)
- Carrot Nose Buttons(optional)
- White Snowflake Buttons, 28mm(optional)
- Black Safety Eyes (6MM)OR Tiny 2-Hole Black Buttons, Size 6 mm for Snowman eyes and/or mouth
- Poly-Fil Premium Fibre Fill, 20-Ounce
- Ornament hangers
- Stitch Marker
- Yarn Needle
Size:
1½ – 2″ Tall x 2 ¼” Wide
Guage:
6 sts x 7 rows = 1″ x 1″
Not critical for this project.
Difficulty:
❤❤ ♡♡ Easy
| Abbreviations: | |
| ch = Chain sp(s) = space(s) st(s) = stitch(es) sl st = Slip Stitch sk = Skip FO = Finish Off | sc = Single Crochet inc = Single Crochet Increase (2 sc in same st) dec = Single Crochet Decrease blo = Back Loop Only flo = Front Loop Only |
| Special Stitches: | |
| MC – Magic Circle | |

Instructions:
- This pattern is written in American Standard Terms.
- Place a marker in the first stitch of every round to indicate the beginning and move the marker up at the start of each new round.
- All stitches are worked through both loops unless otherwise indicated.
- Instructions between ** are to be repeated until the end of the round.
- Instructions between [] are made in the same st.
- Numbers between () indicate the total amount of stitches in that round.
- When making color changes, remember to always change to the new color before the last yarn over of the last stitch in the old color
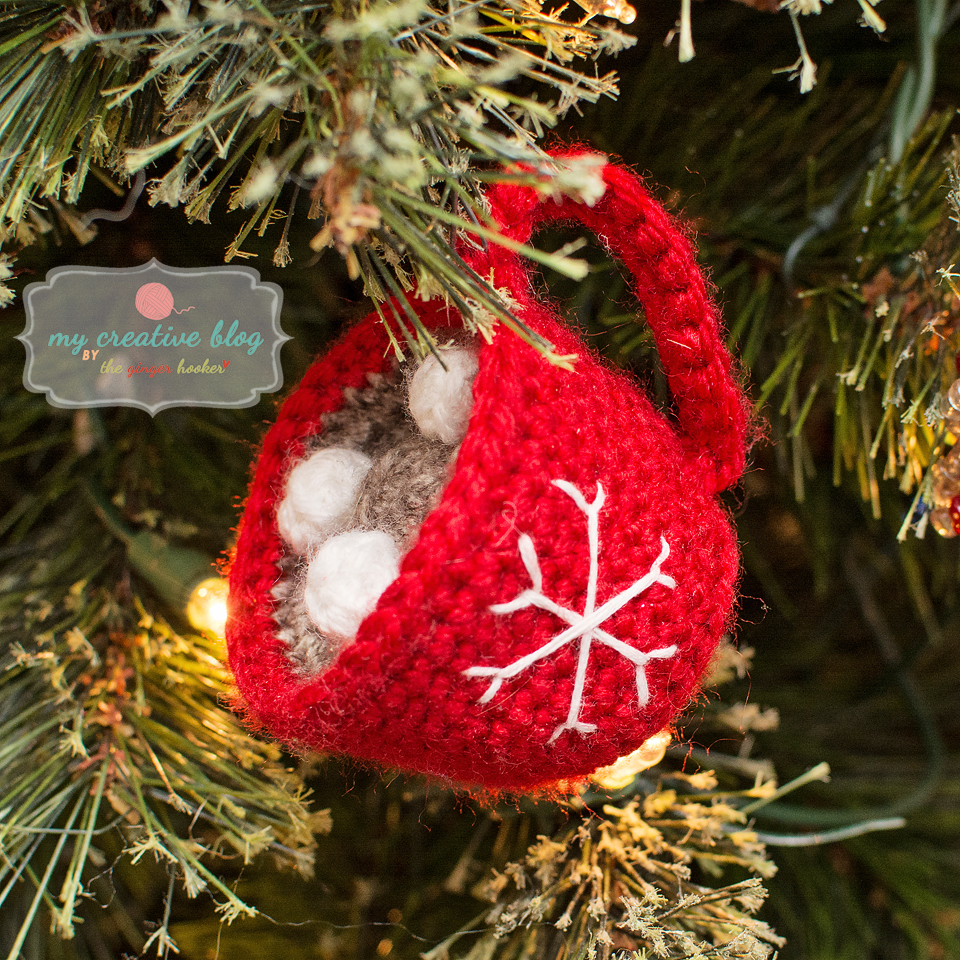
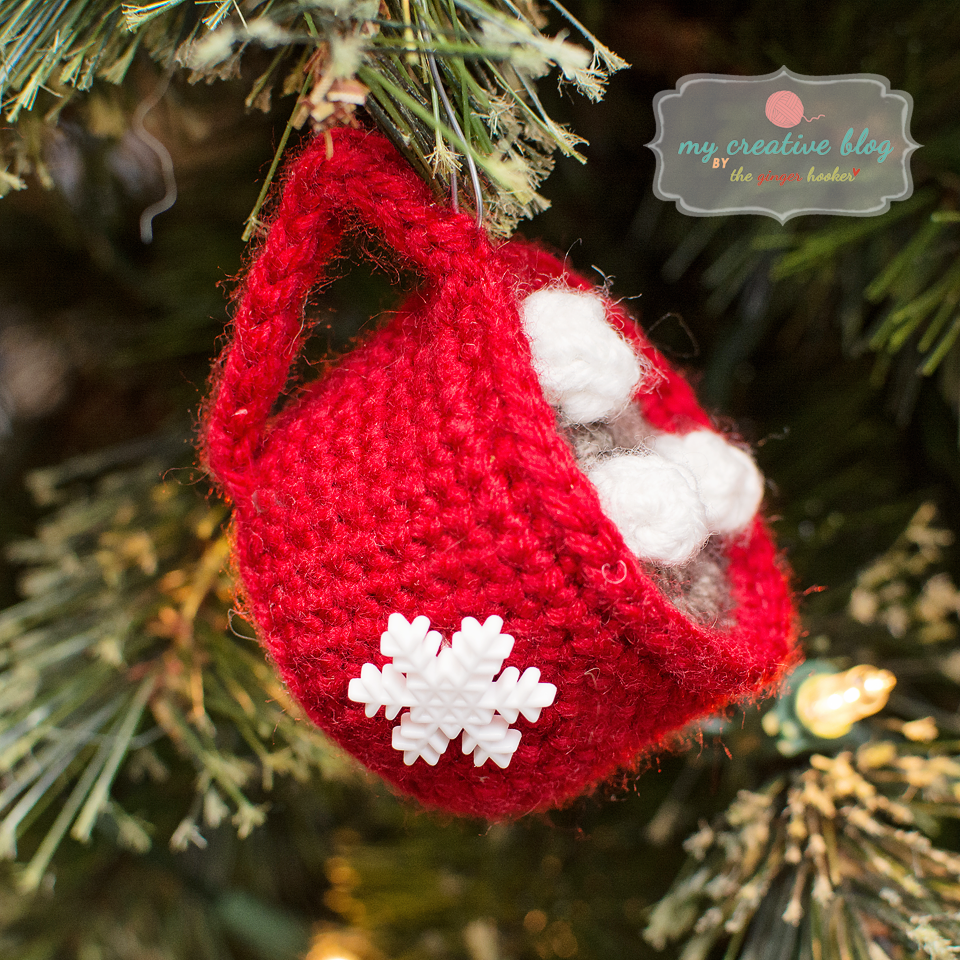
Hot Chocolate:
Round 1: With brown, 6 sc in MC. (6)
Round 2: inc in each st around. (12)
Round 3: inc in each st around. (24)
Round 4: *sc 3, inc* repeat around. (30)
Round 5: *sc 4, inc* repeat around. (36)
FO. Weave in ends.
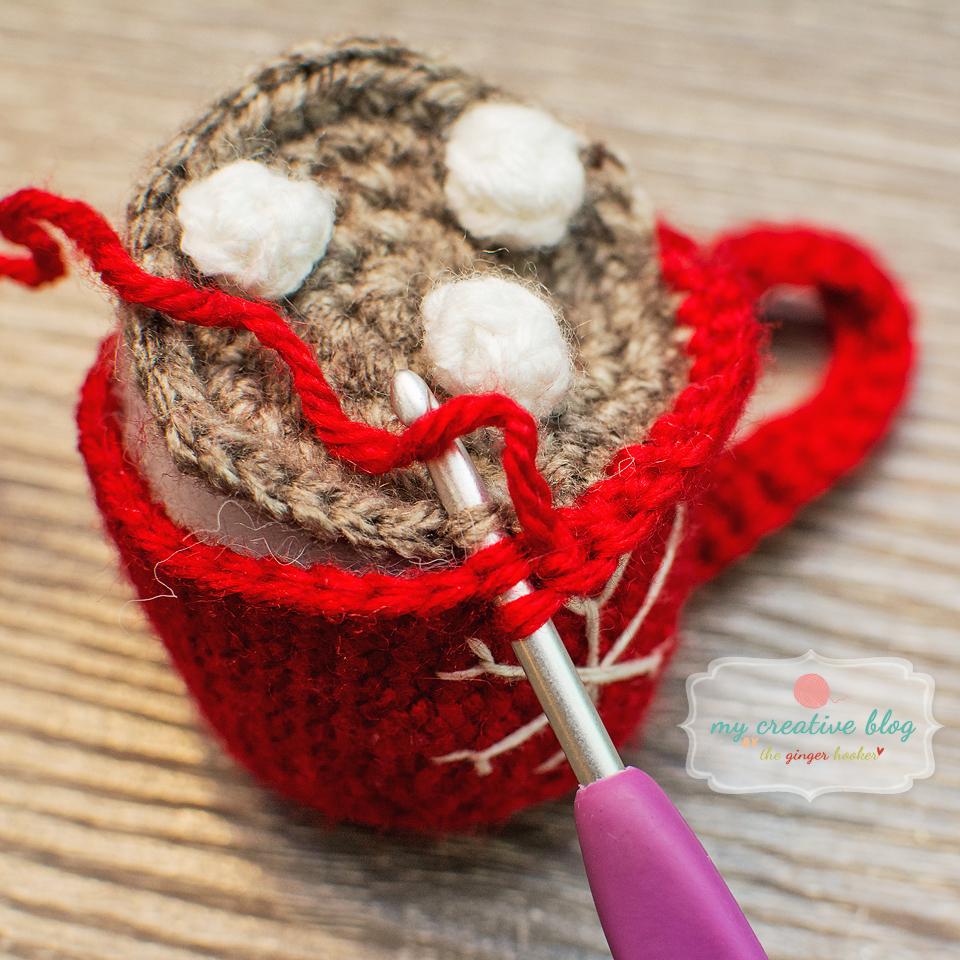
Marshmallows: (Make 3 or as many as you like)
Round 1: With white, 4 sc in MC (4)
Round 2: In blo, sc in each st around. (4)
Close top by weaving tail through blo and pulling closed. Leave a long tail and sew marshmallows to hot chocolate.
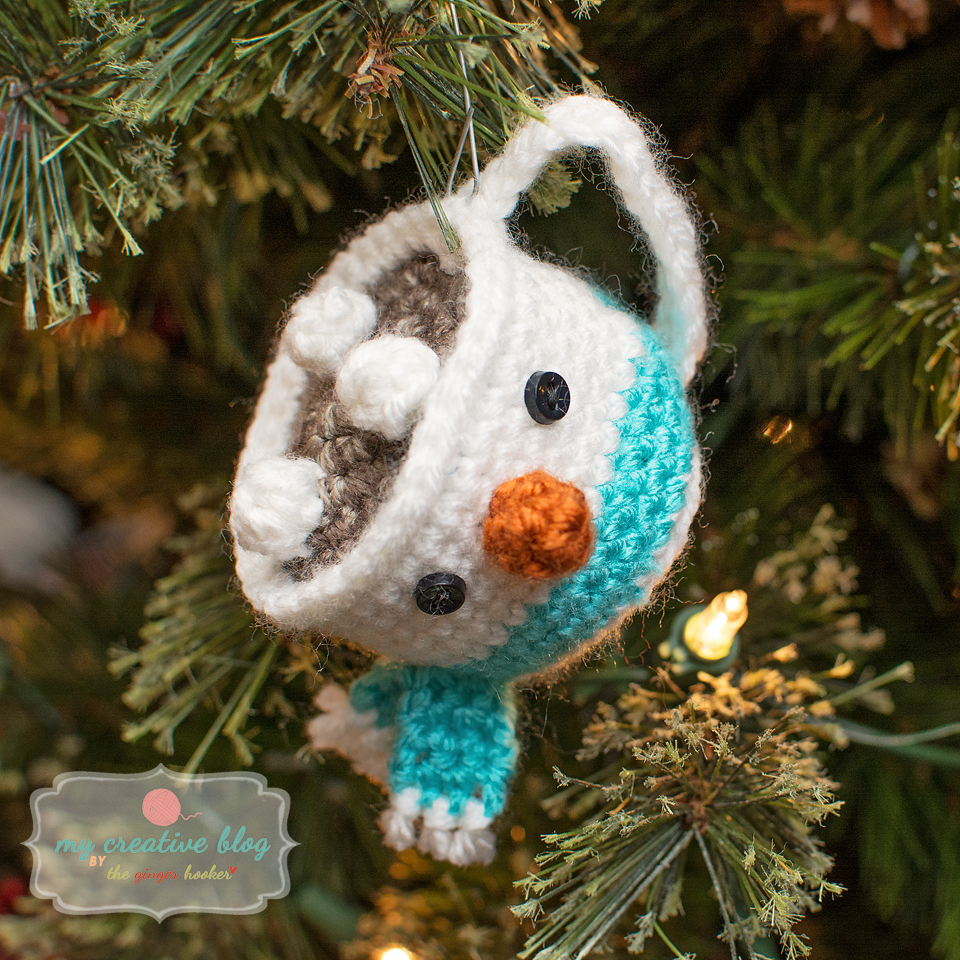
Carrot Nose: (optional)
Round 1: With orange, 4 sc in MC. (4)
Round 2: *sc, inc* repeat around. (6)
Round 3: sc in each st around. (6)
FO. Leave long tail for sewing to mug.
Sew Scarf Option: (optional)
Create if making the Snowman Mug with a scarf.
Row 1: ch 4, sc in 2nd ch and next 2 chs. (3)
Row 2 – 8: ch 1, turn, sc in each st. (3)
FO. Weave in ends. Fold scarf in half and add to the side of the mug between rounds 6-8.
No Sew Scarf Option: (optional)
Create if making the Snowman Mug with a scarf.
Row 1: ch 4, sc in 2nd ch and next 2 chs. (3)
Row 2 – 4: ch 1, turn, sc in each st. (3)
Row 5: Join scarf to the mug by working vertically between rounds 6-8 of the mug and st on row 4 of the scarf, sc in next 3 stitches. (3)
Row 6 – 8: ch 1, turn, sc in each st. (3)
FO. Weave in ends.
Handle:
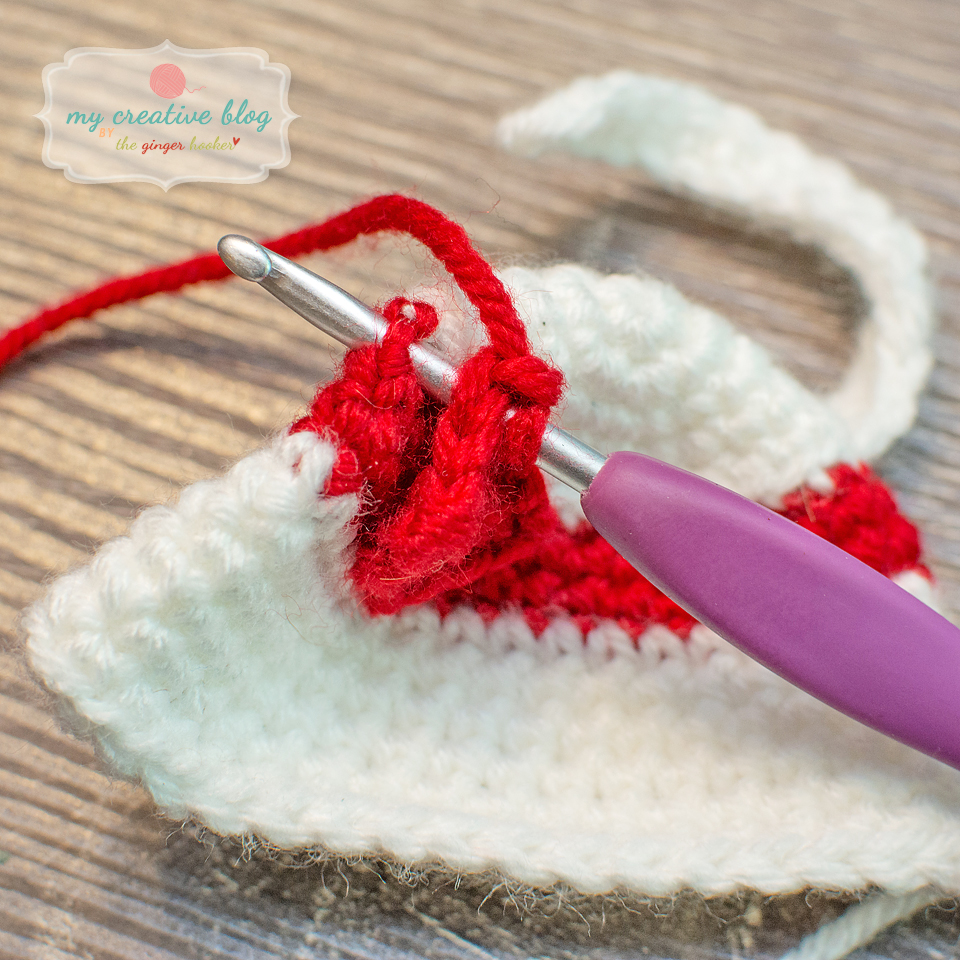
With main cup color, chain 16. Sc in 2nd chain from hook and each chain across. Leave long tail for sewing to mug.
Mug:
I recommend sewing any embellishments (snowman face, snowflakes, handle) before adding the hot chocolate to the mug.
Round 1: With cup color, 6 sc in MC. (6)
Round 2: Inc in each st around. (12)
Round 3: *sc, inc* repeat around. (18)
Round 4: *sc 2, inc* repeat around. (24)
Round 5: *sc 3, inc* repeat around. (30)
If working a Snowman cup with a scarf, change the scarf color now and work next 3 rounds then switch back to the main cup color. Otherwise, continue in main cup color.
Round 6: In blo, *sc 9, inc* repeat around. (33)
Round 7: In both loops, *sc 10, inc* repeat around. (36)
Round 8-14: sc in each st around. (36)
If working the snowman cup, add 6mm safety eyes to mug between rnds 12-13 approximately 4-5 sts apart.
Add fiberfill to mug before fully closing with the hot chocolate top.
Round 15: Working in both loops of the stitches on the cup and with the right side of the hot chocolate facing up the flo of the stitches on the hot chocolate, sc in each st around.
FO. Weave in ends.
Sew on the handle. Add a hanger and enjoy this holiday season!
Don’t forget to share your projects on Ravelry or in the comments!
Or share on Instagram and tag #mycreativeblog.

Leave a comment